| View previous topic :: View next topic |
| Author |
Message |
agfisher
Joined: 09 May 2007
Posts: 478
Location: West Hartford, CT
|
 Posted: Wed Aug 10, 2016 6:07 am Post subject: Rear Fuel line Rebuild Posted: Wed Aug 10, 2016 6:07 am Post subject: Rear Fuel line Rebuild |
 |
|
Not super technical but I thought I would document the process I'm taking to rebuild the rear fuel lines in my 77 924. I while edit this first post as I add more information.
Here's my plan of attack for the rebuild.
1] Measure the lengths of all the hoses before damaging.
2] Break the assembly down into individual pieces and cut collars off of hoses.
3] Measure inner and outer diameter of hose for size verification and order appropriate fuel injection hose. Exacting to order around 3/8". Something like this http://www.speedwaymotors.com/Black-Push-On-Hose-6-AN,8976.html.
Looking at this stuff. Read quite a few good reviews about it. https://www.oreillyauto.com/detail/b/barricade-3759/belts-hoses-16454/hoses-25069/bulk-hose-16664/bulk-hose---fuel-hose-18164/0a74c36f4425/gates-barricade-5-16-inch-hose/27345/4349954?q=fuel+hose&pos=1
4] Clean up all fittings in my tumbler.
5] Electroplate fittings to protect.
6] Reassemble with new hose and fuel injection hose clamps. Like this http://www.jegs.com/i/JEGS+Performance+Products/555/16047/10002/-1
7] Install back into car.
Step One
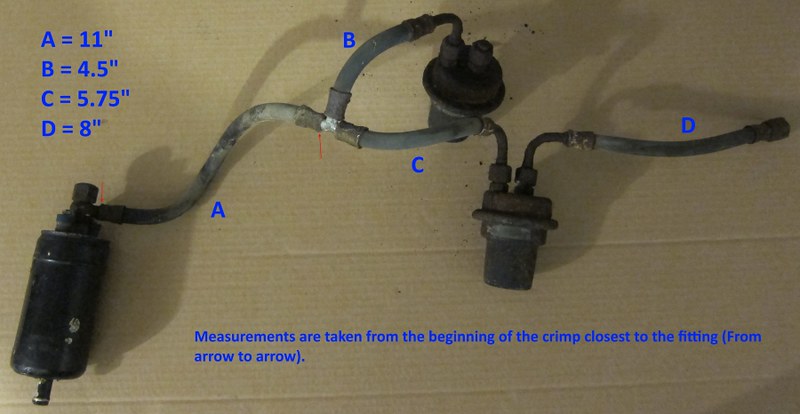
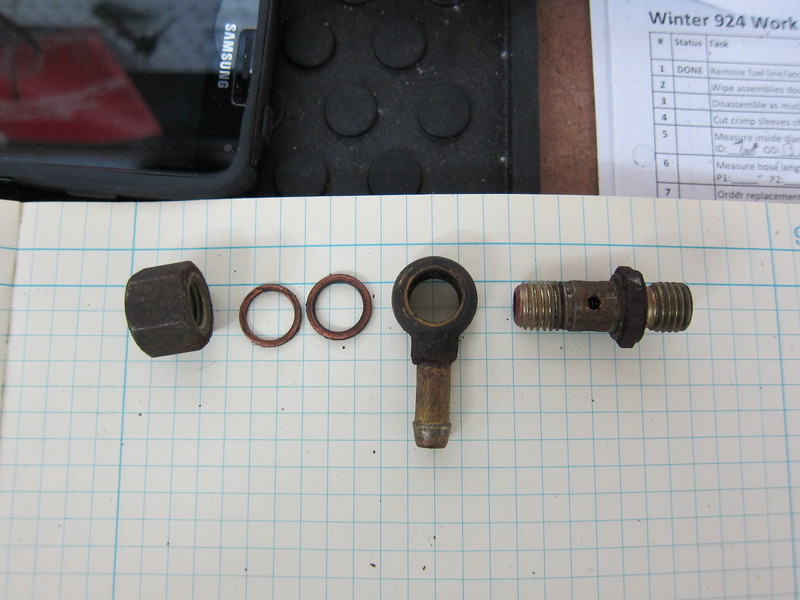
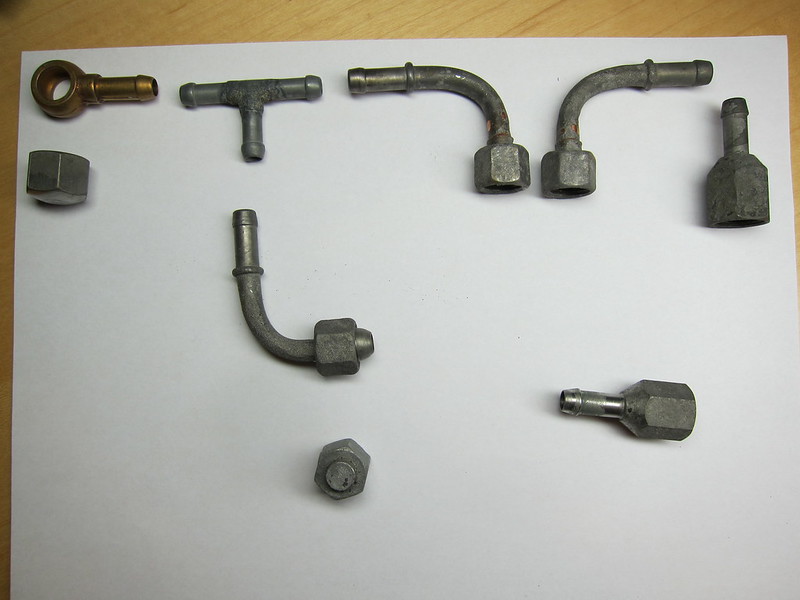
The assembly has been removed from the car and is currently being soaked with Kroil to loosen fittings up. I took a picture of it's current set up and took measurements of all the hoses. The picture included below details these measurements for reference.
Step Two
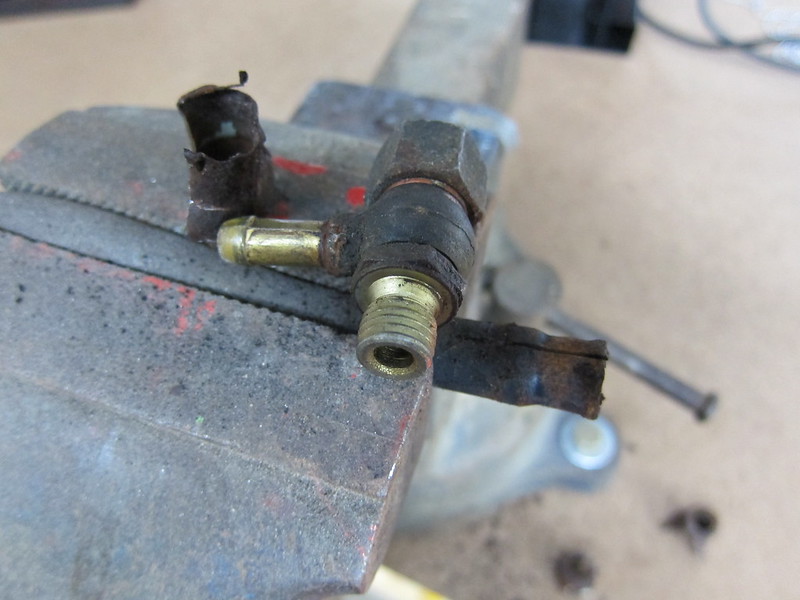
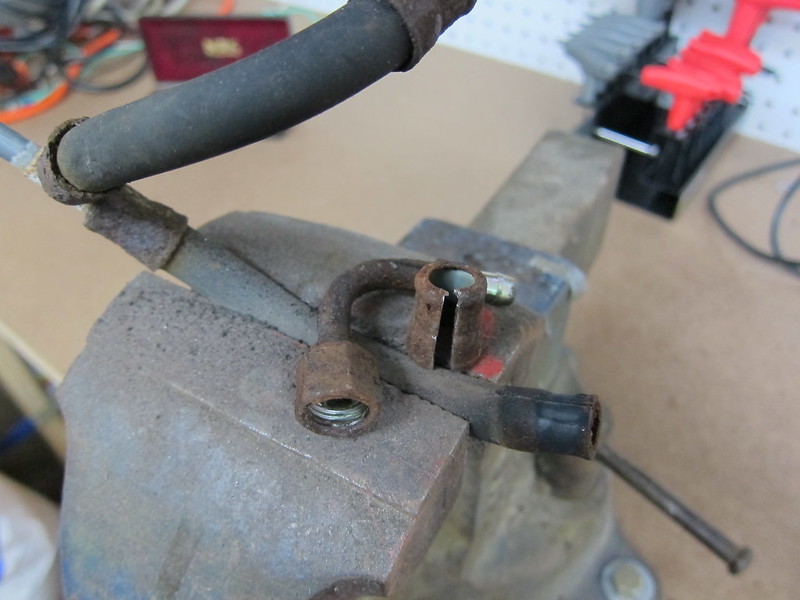
I was able to break down the individual pieces without anything breaking or getting damaged. Here are a couple of photos showing how I cut the collars off.

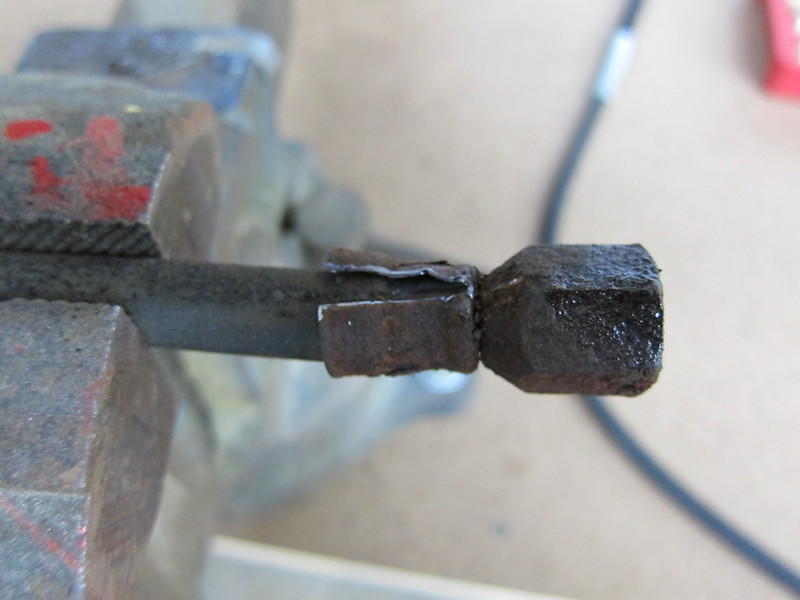
I used a heavy-duty cut-off wheel on a Dremel to cut the collar. When cutting be careful not to hit the fitting on the end and damage it. Just cut the collar.
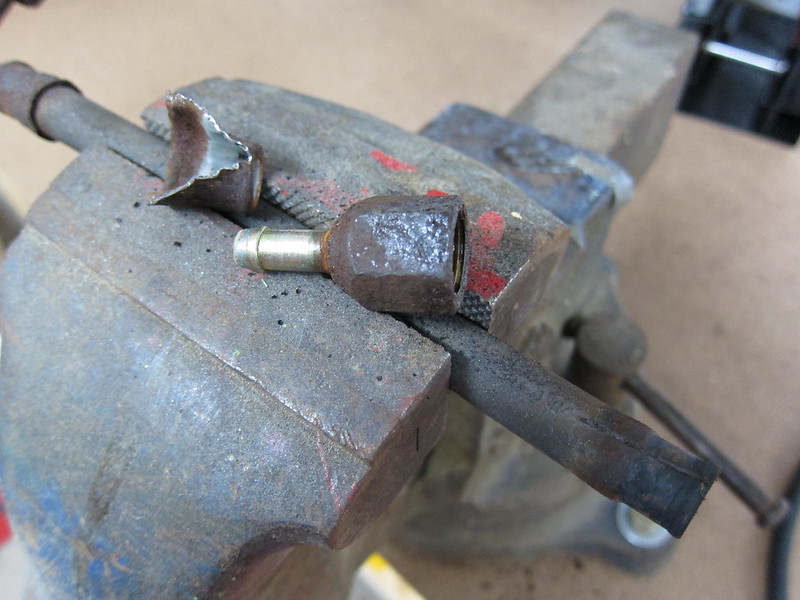
I found out you don't have to cut it all the way. Cut it most of the way and the fitting will just pull out.
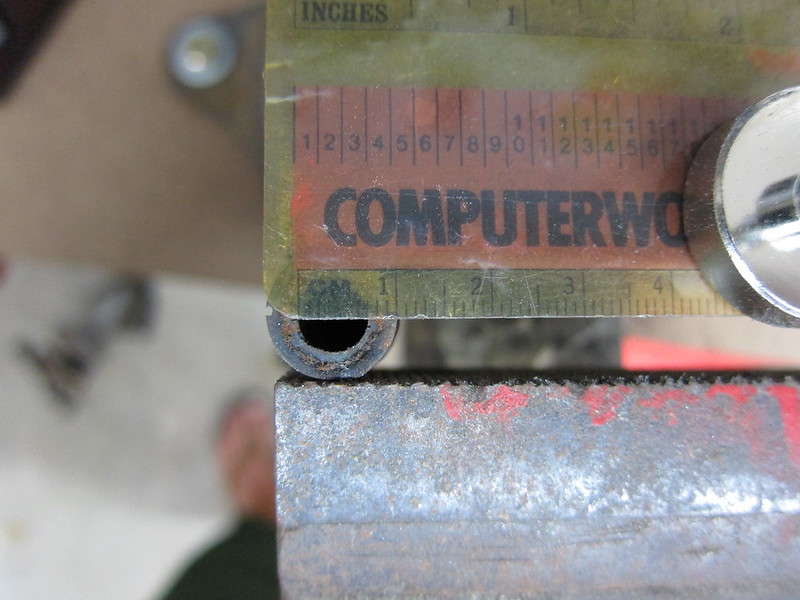
I measured the inside diameter of the hoses used and it looks like they are 7mm ID (13mm OD).
Once the hoses were clear of the fittings I did some more careful measurements of the lengths. Here are the updated lengths.
A = 11 1/8"
B = 4 3/8"
C = 5 1/2"
D = 7 3/4"
Step Three
This is the replacement line I'm looking at right now https://www.amazon.com/dp/B0058XDL0K/ref=wl_it_dp_o_pd_S_ttl?_encoding=UTF8&colid=GOPLIP3P93XG&coliid=I1LCONSUIWSB6H
Step Four
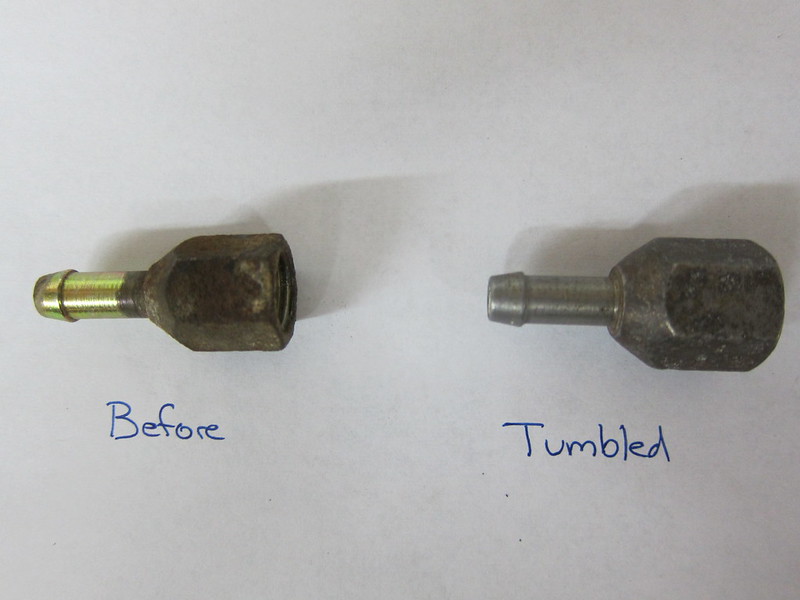
Here are some before and after pictures of some parts I ran through my tumbler. This is the first time I used it so I'm still getting the hang of it. I'm wondering if I should pick up one of those ultrasonic cleaners that Dan was talking about (http://www.924board.org/viewtopic.php?t=41990&highlight=ultrasonic) for getting the pieces super clean before plating.
Before:
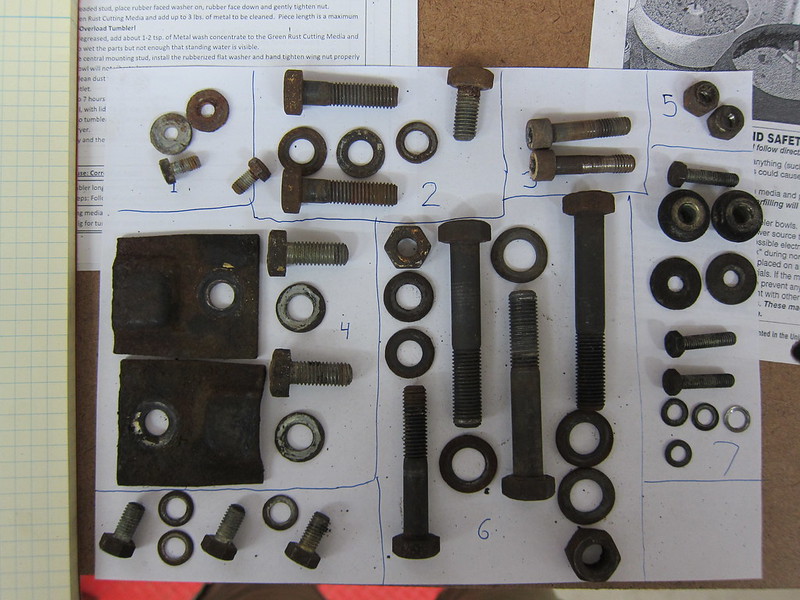
After:
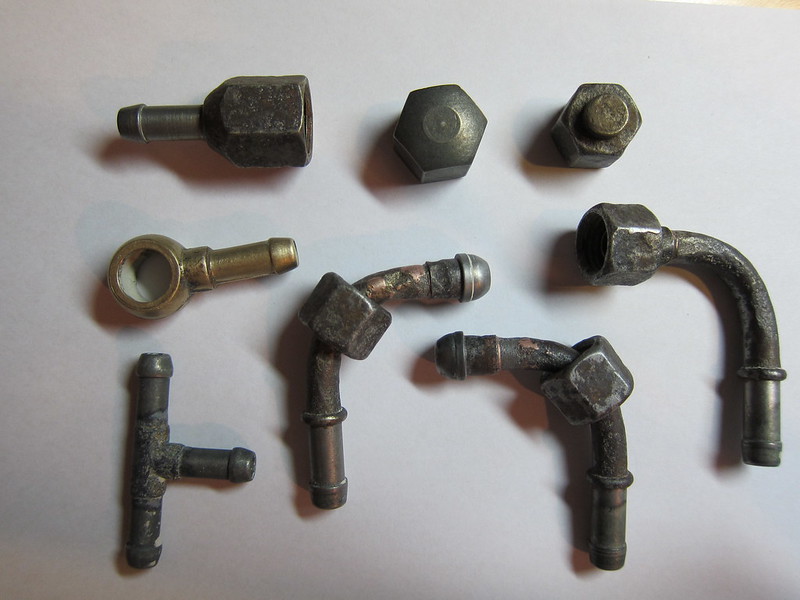
Here are some photos of the fuel system pieces before.
 [ [
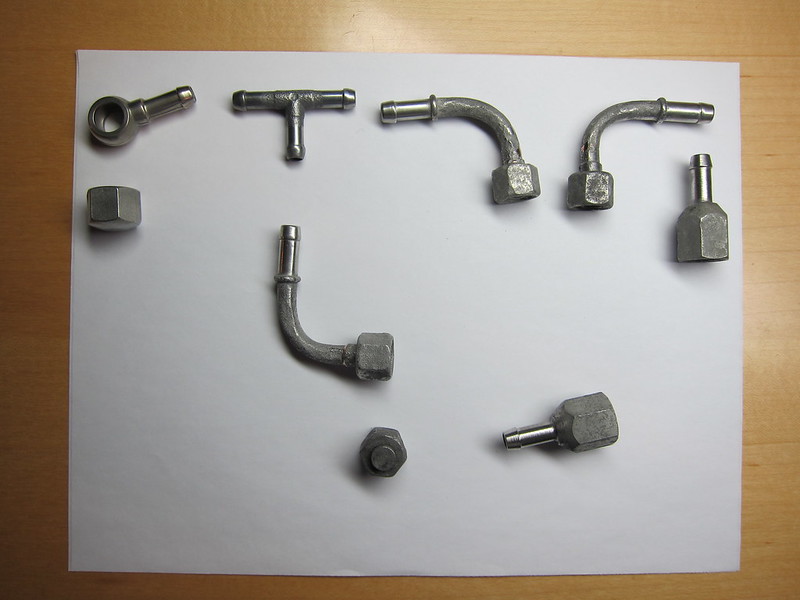
And after...
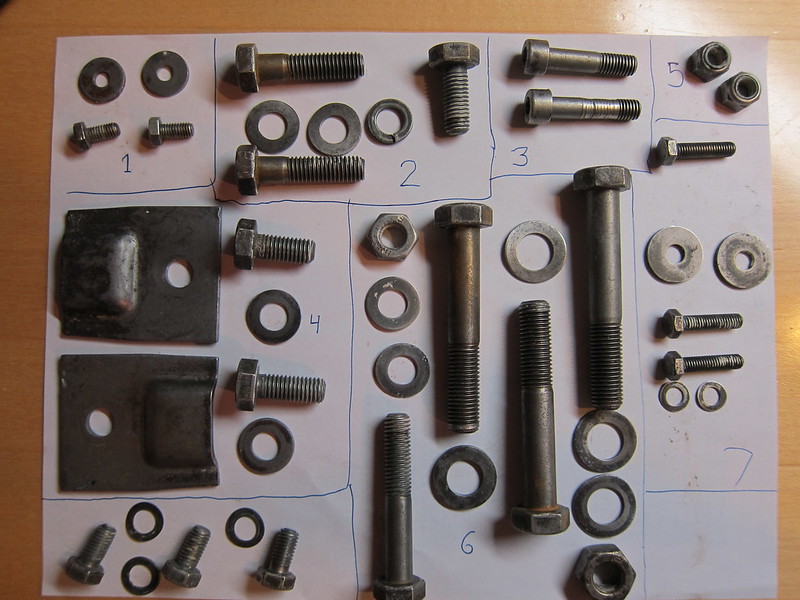
Here are some shots of some before and afters using the Ultrasonic Cleaner with the WD-40 Rust Removal Soak.
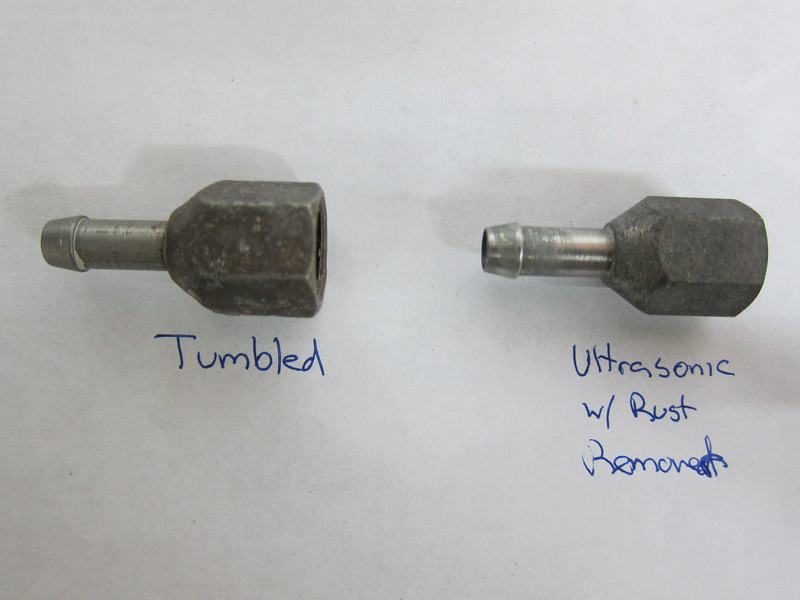
As of right now I'm really liking how the Ultrasonic Cleaner is working. It seems to do just a good a job but is much quicker. I'll try it some more and post some more pictures.
Here are some pictures of the fully cleaned hardware, before and after.
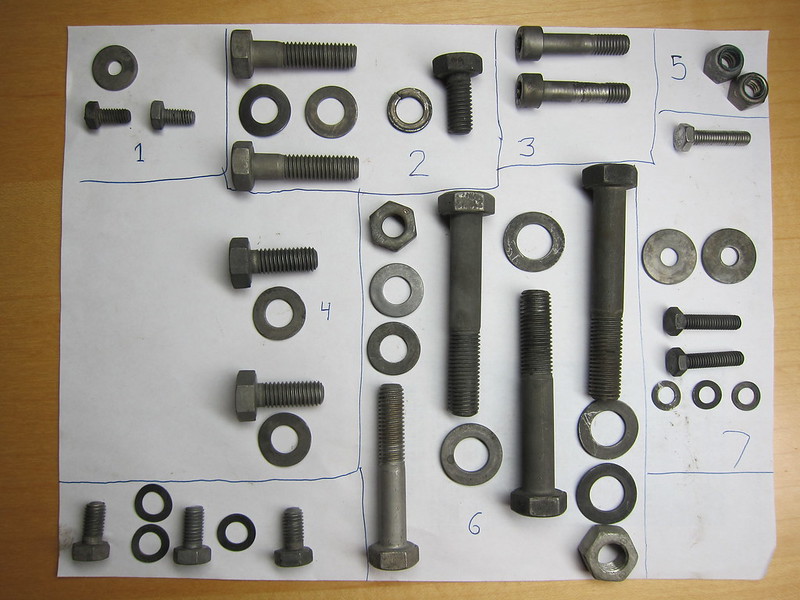
and the fuel system pieces
My verdict on the tumbler vs. the ultrasonic cleaner with the rust remover is the ultrasonic. Man, it really cleans well. The one problem is, in my experience, that you can't put too many pieces at once and the WD-40 Rust Remover solution is expensive (compared to how long it lasts). I want to try some of the homemade rust removing solutions (White Vinegar and salt, etc.) to see if they work just as well.
Step 5
OK, I got the plating down and here is a picture of the final pieces.
Step 6
Wow, long delay!! Sorry about that. Finally have to to work on this again and now it's time to put it all back together.
I decided to use this hose (https://www.oreillyauto.com/detail/b/barricade-3759/belts-hoses-16454/hoses-25069/bulk-hose-16664/bulk-hose---fuel-hose-18164/0a74c36f4425/gates-barricade-5-16-inch-hose/27345/4349954?q=fuel+hose&pos=1) and these clamps (https://www.amazon.com/21014-Injection-Style-Clamp-10-PK/dp/B00OL264DU/ref=sr_1_fkmrnull_1?keywords=21014+Clamp&qid=1558106489&s=gateway&sr=8-1-fkmrnull - DON'T ORDER THESE, READ BELOW)
I cut the hoses into the needed lengths and reassembled using the plated hardware. Remember the hose that leads to the dead end accumulator has a restrictor in it (Thanks for the photo and reminder Ozone!)

Once everything is back together it looks like this.

The one problem I ran into is the clamp I ordered (mentioned above) seem to be a little big so I replaced with these (https://www.amazon.com/gp/product/B00OL26AW0/ref=ppx_yo_dt_b_asin_title_o02_s00?ie=UTF8&psc=1)
I will take some photos once the whole setup is back in the car.
To Be Continued...
_________________
1977 924 N/A Martini Edition
Last edited by agfisher on Sat May 18, 2019 1:44 am; edited 13 times in total |
|
| Back to top |
|
 |
brian19600

Joined: 28 Oct 2013
Posts: 375
Location: NJ/CT
|
| Posted: Mon Aug 15, 2016 2:16 am Post subject: |
|
|
Are the crimp tools expensive to do it like the factory?
_________________
78 924 |
|
| Back to top |
|
|
agfisher
Joined: 09 May 2007
Posts: 478
Location: West Hartford, CT
|
| Posted: Mon Aug 15, 2016 2:30 am Post subject: |
|
|
I'm assuming yes so I never really looked into it. The ones I've seen at hydraulic are big. A hydraulic shop should be able to crimp a new one on for you but I wanted to find a solution I can do myself and modify if needed. With the fuel injection clamps I should be able to modify it to a 40cc accumulator system pretty easily if needed
_________________
1977 924 N/A Martini Edition |
|
| Back to top |
|
|
Fasteddie313

Joined: 29 Sep 2013
Posts: 2596
Location: MI
|
| Posted: Mon Aug 15, 2016 8:33 am Post subject: |
|
|
I think that if you just take that fuel line assembly right to a hydraulic hose shop, they can uncrimp your original fittings, replace the rubber lines, and then just recrimp your fittings..
_________________
80 Turbo - Slightly Modified |
|
| Back to top |
|
|
agfisher
Joined: 09 May 2007
Posts: 478
Location: West Hartford, CT
|
| Posted: Mon Aug 15, 2016 9:21 am Post subject: |
|
|
Your can but for me that would be crimping a new hose on really rusty fittings so if I went that way I would take them apart at home, clean them up, finish them and then get them recrimped at a hydraulic shop.
_________________
1977 924 N/A Martini Edition |
|
| Back to top |
|
|
brian19600
Joined: 28 Oct 2013
Posts: 375
Location: NJ/CT
|
| Posted: Sat Sep 10, 2016 2:55 am Post subject: |
|
|
In reference to the fuel hose on Amazon:
I'm thinking that it is not 15 feet but 15".
_________________
78 924 |
|
| Back to top |
|
|
agfisher
Joined: 09 May 2007
Posts: 478
Location: West Hartford, CT
|
| Posted: Sat Sep 10, 2016 3:48 am Post subject: |
|
|
It might be. I was just referencing the product type. My FLAPS carries the same stuff so I'll most likely get what I need there.
_________________
1977 924 N/A Martini Edition |
|
| Back to top |
|
|
macBdog

Joined: 16 Aug 2004
Posts: 1111
Location: Brisbane, Australia
|
| Posted: Sat Sep 10, 2016 8:58 am Post subject: |
|
|
Love your method! Doing it RIGHT.
_________________
1979 931 with a 350 chev
1973 911E with EFI
| p-talk wrote: | I'm still convinced the word 'Porsche' makes people crazy in all kinds of ways  |
|
|
| Back to top |
|
|
ideola

Joined: 01 Oct 2004
Posts: 15548
Location: Spring Lake MI
|
| Posted: Sat Sep 10, 2016 10:01 pm Post subject: |
|
|
Very cool writeup, will be following to see where this goes.
One word of warning: the CIS system operates at much higher pressure (more than double) normal EFI systems. I'm not comfortable that those fuel injection clamps are sufficient. At minimum, I would double clamp the fittings. Also, make sure the fuel hose you select is rated for at least 120 PSI.
Another suggestion: Harbor Freight carries an inexpensive ultrasonic jewelry cleaner. I've been using that on the heat cycle with WD40 rust remover soak, and it works wonders on almost everything I've attempted so far. It's faster and more effective than the tumbler, and I think will do a much better job preparing your end pieces for re-plating (suggest yellow cad dichromate). Do not use any other rust remover, as the other products I tried left a really sticky residue that required recleaning. The WD40 product is the best so far.
_________________
erstwhile owner of just about every 924 variant ever made |
|
| Back to top |
|
|
agfisher
Joined: 09 May 2007
Posts: 478
Location: West Hartford, CT
|
|
| Back to top |
|
|
agfisher
Joined: 09 May 2007
Posts: 478
Location: West Hartford, CT
|
| Posted: Mon Oct 03, 2016 6:35 am Post subject: |
|
|
Updated first post...
_________________
1977 924 N/A Martini Edition |
|
| Back to top |
|
|
brian19600
Joined: 28 Oct 2013
Posts: 375
Location: NJ/CT
|
| Posted: Wed Oct 19, 2016 6:45 am Post subject: |
|
|
One of the members has some 20cc accumulators in the for sale section.
_________________
78 924 |
|
| Back to top |
|
|
brian19600
Joined: 28 Oct 2013
Posts: 375
Location: NJ/CT
|
| Posted: Wed Oct 19, 2016 1:53 pm Post subject: |
|
|
On a side note, the 477209241A is no longer available. So it is either the 477209241 from Griffiths, or rebuild it like yours.
_________________
78 924 |
|
| Back to top |
|
|
agfisher
Joined: 09 May 2007
Posts: 478
Location: West Hartford, CT
|
| Posted: Fri Nov 18, 2016 4:54 am Post subject: |
|
|
Couple of updates. Rebuilding the harness in the next couple of days.
_________________
1977 924 N/A Martini Edition |
|
| Back to top |
|
|
ozone
Joined: 28 Dec 2016
Posts: 4
Location: Dallas, TX
|
| Posted: Wed Jan 04, 2017 4:43 am Post subject: |
|
|
Something to consider: the threads on the accumulators are -6 sized, JIC fittings.
AN fittings will thread on, but will not work/seal.


Side note: did you find the restrictor in the first accumulator line?


 |
|
| Back to top |
|
|
|

