| View previous topic :: View next topic |
| Author |
Message |
ideola

Joined: 01 Oct 2004
Posts: 15548
Location: Spring Lake MI
|
 Posted: Sat Aug 08, 2009 12:31 am Post subject: Posted: Sat Aug 08, 2009 12:31 am Post subject: |
 |
|
Gavin, haven't installed them yet. The rear suspension is scheduled to go in on the 15th (torsion bar indexing, what fun!!!!), after which I'll be able to report back on fitment of the sway bar pieces. But you can hardly go wrong given the price. They're really just basic rod end bits pre-sized and assembled...
_________________
erstwhile owner of just about every 924 variant ever made |
|
| Back to top |
|
 |
ideola
Joined: 01 Oct 2004
Posts: 15548
Location: Spring Lake MI
|
| Posted: Mon Aug 10, 2009 10:38 pm Post subject: |
|
|
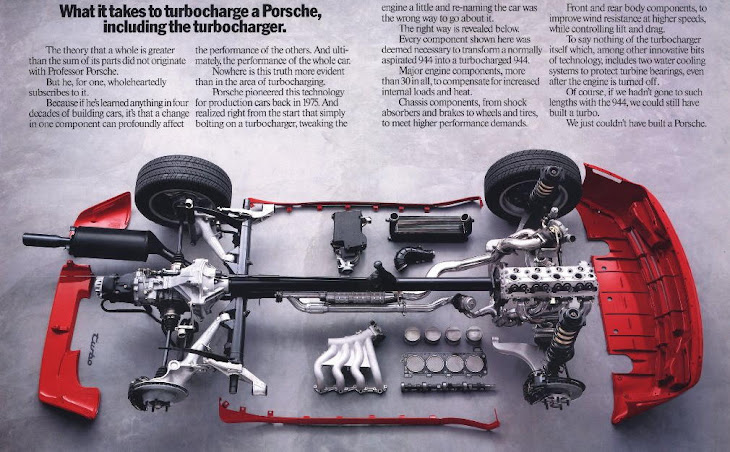
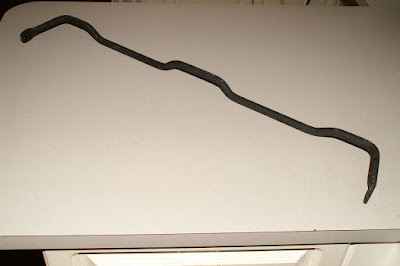
Speaking of sway bars, here are pix of the reconditioned (powder-coated) rear 18mm and front 25.5mm bars that I picked up in VA back in May 2008:
 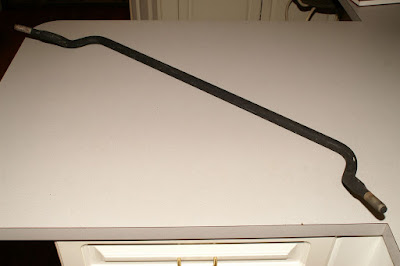
And also, the reconditioned torsion carrier wing mounts (media blasted, prepped, and painted with POR15 rust prohibitive paint):
_________________
erstwhile owner of just about every 924 variant ever made |
|
| Back to top |
|
|
Cedric

Joined: 27 Aug 2004
Posts: 2608
Location: Sweden
|
| Posted: Tue Aug 11, 2009 2:34 am Post subject: |
|
|
Torsion bar indexing is not a big deal. With a little help of a excel document from the 944spec site I set mine almost spot on at the first try. Just a bit of minor adjusting at the spring plate..
_________________
1980 924 Turbo
www.instagram.com/garagecedric/ |
|
| Back to top |
|
|
ideola
Joined: 01 Oct 2004
Posts: 15548
Location: Spring Lake MI
|
| Posted: Tue Aug 11, 2009 3:00 am Post subject: |
|
|
Yeah, except my suspension is completely apart so I have no reference because I'm installing completely new bars...what I want is 5" ride height with 30mm bars, but I don't have a way to measure the old setup.
_________________
erstwhile owner of just about every 924 variant ever made |
|
| Back to top |
|
|
Joes924Racer

Joined: 03 Nov 2002
Posts: 11964
Location: Oregon, Denver Colorado native!
|
| Posted: Tue Aug 11, 2009 4:34 am Post subject: |
|
|
por 15 is good sh*t.. um looks all good.
_________________
1979 porsche 924 Na
1980 porsche Turbo 931GT Replica
Have u ever driven a turbo. |
|
| Back to top |
|
|
ic932
Joined: 11 Feb 2005
Posts: 1104
Location: UK
|
| Posted: Wed Aug 12, 2009 5:29 am Post subject: |
|
|
| ideola wrote: | | Yeah, except my suspension is completely apart so I have no reference because I'm installing completely new bars...what I want is 5" ride height with 30mm bars, but I don't have a way to measure the old setup. |
Dan, because you have no reference from the old set-up a rough guide would be to use the thick alloy spacer (this should be the round version for alloy arms an not the oval one). Usually, this alloy spacer provides pre-load on the springplate/t-bar. With 30mm bars you will not be preloading the T-bars. Aim to position the springplates approx 5mm above the spacer. This will get you close to where you want to be with 30mm bars. I find it easier to set the springplates on the lowest ride height setting first.
Once you are in the right zone then you can make precise measurements. |
|
| Back to top |
|
|
ideola
Joined: 01 Oct 2004
Posts: 15548
Location: Spring Lake MI
|
| Posted: Wed Aug 12, 2009 8:18 am Post subject: |
|
|
Dave, that's a great tip, thanks for that, and it also clears up another question...I couldn't figure out which spacer to use, the round or ovoid, so thanks for that too!
I do have the 941 up on stands at the moment, and it's been lowered to 5" ride height, so I think I may be able to use it as a reference point with 23.5mm bars, and do the math from there to figure out where the UWB setup needs to be.
_________________
erstwhile owner of just about every 924 variant ever made |
|
| Back to top |
|
|
924RACR
Joined: 29 Jul 2001
Posts: 8803
Location: Royal Oak, MI, USA
|
| Posted: Wed Aug 12, 2009 9:50 pm Post subject: |
|
|
I have some cardboard templates at home.
_________________
Vaughan Scott
Webmeister
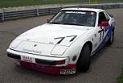
'79 924 #77 SCCA H Prod racecar
'82 931 Plat. Silver
#25 Hidari Firefly P2 sports prototype |
|
| Back to top |
|
|
ideola
Joined: 01 Oct 2004
Posts: 15548
Location: Spring Lake MI
|
| Posted: Wed Aug 19, 2009 4:37 am Post subject: |
|
|
Thanks for the template Vaughan! And also, thanks for the tip about doing the indexing with the control arms OFF. It sure made things a bunch easier. I think Have things set exactly right based on the template, and also based on the ~5mm measurement that Dave mentioned earlier. I got both sides level for sure, and the torsion assembly all put together. I fought with it for about an hour last night trying to get it onto the chassis, and got too tired to continue. I'll try to finish getting it onto the car later this week, as soon as that's done, I can get the rest of the rear suspension assembled and put all four wheels on the ground for the first time in 4 years!
_________________
erstwhile owner of just about every 924 variant ever made |
|
| Back to top |
|
|
pocketscience
Joined: 23 Apr 2006
Posts: 1650
Location: Sydney, Australia... mate!
|
| Posted: Wed Aug 19, 2009 3:02 pm Post subject: |
|
|
Very interested in seeing your 951 rear arms all linked up! 
Cheers,
_________________
Whoever said you can't buy happiness forgot about Porsche!
81 924 N/A, GTS lights, Saratoga, interior, headers, Integral cam, EFI (sold)
95 993
69 911 |
|
| Back to top |
|
|
morghen

Joined: 21 Jan 2005
Posts: 8879
Location: Romania
|
|
| Back to top |
|
|
ideola
Joined: 01 Oct 2004
Posts: 15548
Location: Spring Lake MI
|
| Posted: Fri Aug 21, 2009 12:29 pm Post subject: |
|
|
Some progress tonight 
On Monday I was able to get the torsion bars pretty close to the right settings thanks to a template that Vaughan provided, plus the tip from ic932. Of course, I won't know for sure until the wheels are on and it's sitting on the ground, but I'm optimistic.
Tonight, I hung the torsion carrier, installed the trailing arms and also the shocks. If all goes according to plan, I'm hoping to get the hubs and rear wheels bolted up tomorrow!
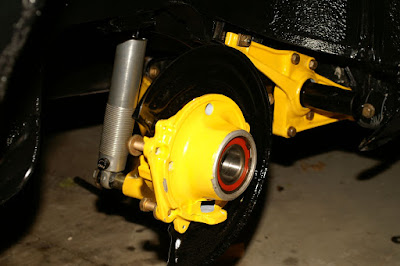 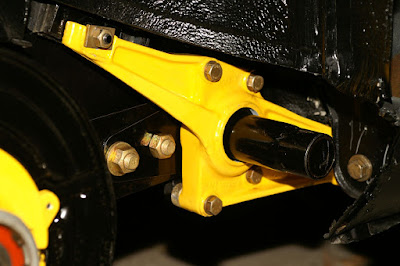
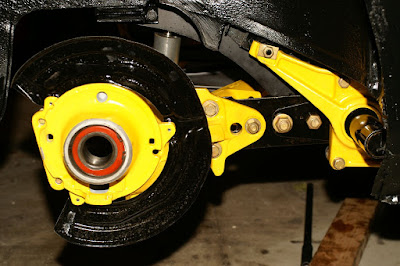 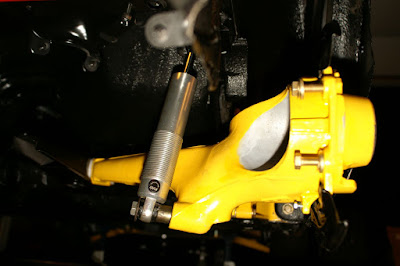
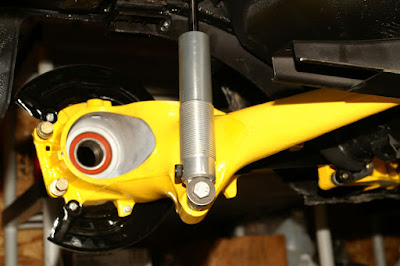 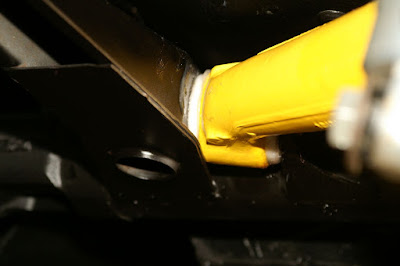
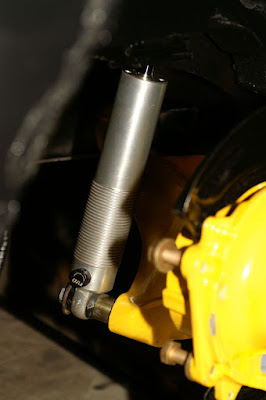  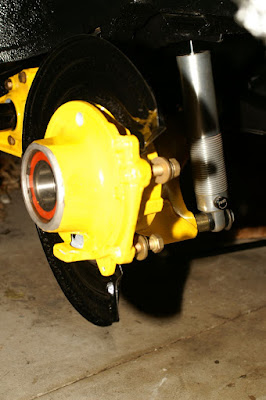
I only had two minor issues with the install. When I first attempted to hang the torsion carrier assembly, the big honker bushing on the LHS torsion cover was hanging up on the inner bolt hole, which apparently had gotten distorted a little when he-who-shall-not-be-named ripped off my five lug suspension. A little creative manipulation with an air chisel hammered it back into shape, and then with some grease for good measure, it slid right into place.
The second minor issue was that the inner trailing arm bushings -- where they attach to the torsion carrier -- had to be surfaced a little because they were just a hair too wide to fit into the bracket. Again, some creative grinding took care of that! Otherwise, everything went together fairly easily.
As a side note, I had previously taken ALL of the suspension hardware and media blasted every single bolt, nut, washer, and spacer, and then had them Cad DiChromated. It sure is nice working with like-new hardware! Also, you can see a few chips in the yellow hardnose paint. Most of that is from meathead me banging things around while assembling or installing. Once I have everything adjusted correctly, I'll probably go back and touch up all the little nicks. And FWIW, the flash on my camera makes the epoxy primer on the chassis look a lot glossier than it does in person. It actually has much more of a satin appearance in person than the photos depict.
_________________
erstwhile owner of just about every 924 variant ever made |
|
| Back to top |
|
|
pocketscience
Joined: 23 Apr 2006
Posts: 1650
Location: Sydney, Australia... mate!
|
| Posted: Fri Aug 21, 2009 1:34 pm Post subject: |
|
|
Very nice Dan. Love the color-coding.
Looks like you did have to add a few washers on the lower rear shock mount.
Can someone flick me the template? I'm going to be putting all mine back together at some point and getting the torsion bars right is scaring me.
Cheers,
_________________
Whoever said you can't buy happiness forgot about Porsche!
81 924 N/A, GTS lights, Saratoga, interior, headers, Integral cam, EFI (sold)
95 993
69 911 |
|
| Back to top |
|
|
agfisher
Joined: 09 May 2007
Posts: 478
Location: West Hartford, CT
|
| Posted: Fri Aug 21, 2009 11:15 pm Post subject: |
|
|
Looks great Dan!
_________________
1977 924 N/A Martini Edition |
|
| Back to top |
|
|
ideola
Joined: 01 Oct 2004
Posts: 15548
Location: Spring Lake MI
|
| Posted: Fri Aug 21, 2009 11:22 pm Post subject: |
|
|
Thanks guys!
Gavin, are you going to be mounting those alu arms to your existing torsion carrier? If so, you need to follow the procedure at Clark's garage to make your own template. That process is pretty straight forward, and it includes the correct math for calculating where things should go based on whatever torsion bars you're planning to switch to, as well as how much you might want to lower the ride height. Make your template BEFORE you disassemble your suspension!!!
As noted above, having the torsion carrier on the bench with the trailing arms detached made things much easier.
The one I have was specifically for 30mm torsion bars setup for 5" ride height, so it wouldn't really do you any good unless that's exactly the setup you're planning to run. It was pretty rudimentary...what I may do is see about making a higher quality copy of it...IF it turns out that I got things setup correctly to begin with 
_________________
erstwhile owner of just about every 924 variant ever made |
|
| Back to top |
|
|
|