| View previous topic :: View next topic |
| Author |
Message |
924RACR
Joined: 29 Jul 2001
Posts: 9064
Location: Royal Oak, MI, USA
|
 Posted: Sun Feb 08, 2015 2:14 am Post subject: Posted: Sun Feb 08, 2015 2:14 am Post subject: |
 |
|
| markmazour wrote: |
924RACR,
Dangit man you've got me rethinking my complexity scale... |
LOL
You definitely DON'T wanna see the complexity scale for the other racecar (Sports Prototype)... so I'll make it up, from things I've done...
1 - swap brake pads/tires
2 - adjust shocks
3 - make plumbing - fab braided hoses, etc.
4 - align/cornerbalance
8 - refresh engine
9 - fabricate/weld frame, suspension components, header
10 - build new bodywork from scratch
_________________
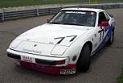
Vaughan Scott
Webmeister
'79 924 #77 SCCA H Prod racecar
'82 931 Plat. Silver
#25 Hidari Firefly P2 sports prototype |
|
| Back to top |
|
 |
pcelenta
Joined: 16 Feb 2007
Posts: 546
Location: long island,ny
|
| Posted: Sun Feb 08, 2015 5:03 am Post subject: |
|
|
yes it can be unbolted from the underside of the plate...there are three screws that fix it to the hall effect base plate....wait you have an '82...its a little different check out standard motor products website to verfiy...but for 1982 924 they list LX-538
http://ecatalog.smpcorp.com/STD/#/vehicles
looks like the one you posted.
its the pick up and reluctor combined.
they go for about $50 bucks. |
|
| Back to top |
|
|
musicalannette
Joined: 21 Feb 2012
Posts: 413
Location: UK
|
| Posted: Sat Feb 14, 2015 10:45 am Post subject: |
|
|
doesn't that hotspark thing look the easiest and cheapest solution?
has anyone tried it before?
especially if you replace for the points type of the early car? the points are probably very awkward to adjust and set where the dizzy is placed?
_________________
I KNEW white wall tyres were invented by Americans .....just not at Boeing.... to be fitted on the 737..... |
|
| Back to top |
|
|
markmazour
Joined: 29 Sep 2008
Posts: 37
Location: Vermillion, South Dakota
|
| Posted: Wed Aug 05, 2015 1:51 am Post subject: |
|
|
Yes it easy.
1. Set the engine to TDC cyl 1.
2. Pull the distributor cap off, disconnect the coil wire plug and vacuum hoses.
3. Take a Sharpie marker and mark a line on the rotor and on the dustcover and note with a 1.
4. Mark the body of the dist where the clamp stud is.
5. Unbolt and remove the clamp, slowly remove the distributor after the rotor tops rotating mark another set of marks on the rotor and dustcover and note with a 2.
6. At the work bench remove the top snap ring and hall effect rotor (I used an old battery terminal puller).
7. Remove the second snap ring.
8. Remove the vacuum advance assembly.
9. Remove the sender assembly.
10. Don't mess with the weights just clean and grease like pcelenta noted.
11. Install the new components in reverse order noted in steps 6-9 one note trying to get the Hall effect rotor key installed is difficult if you try to slide them on together. I slid the rotor on layed the dist sideways and slid the round key down the groove and gently tapped it into place with a pin and the handle of a screwdriver.
12. Also installing the vacuum advance assembly takes a little patience but it is just a matter of getting the tang over the pin and holding it in place with screwing it back in. To confirm that you've got it installed correctly just turn the sender assembly top plate it should rotate slightly and return to its original position.
13. Using the alignment marks noted in steps 3, 4, & 5 install the distributor.
14. Put the distributor cap on, connect the coil wire plug and vacuum hoses.
15. Start your Porsche 924 for the first time in 12 months take her for a spin. Park it, do the happy dance, sit back and sip a beer while admiring your fine German sportscar and congratulating yourself on your mechanical DIY prowess.
_________________
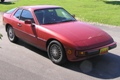
Mark
1982 Porsche 924 Indiana Red Metallic SOLD
2001 BMW 325i Silver SOLD
2011 BMW335is Space Gray 6mt |
|
| Back to top |
|
|
gti69
Joined: 27 Feb 2008
Posts: 8
Location: Glasgow UK / Poland
|
| Posted: Tue Jun 06, 2017 6:39 am Post subject: |
|
|
Thank you! Thank you! Thank you!
I just started my 1981 n/a 924 after it has been sitting in the garage for 5 years! I was troubleshooting the no-spark issue for the last year or so and eventually bought lx-536 pickup coil, installed it and voila! Started without any issues! Just need to check on whether the vac advance assembly clicked on properly.
The coil seems to be used on some old Volvos and after hours of cross-referrencing the part numbers it seems like the lx-536 is correct for the newer models and as it turns out works fine.
Once again, thanks for this write up. Someone should make it a sticky guide for no start/no spark issues.
Regards,
Tom
_________________
Tom
VW SCIROCCO GT2 '92 - 95 BHP - LHD
VW SCIROCCO GTX '84 - 112BHP - RHD
VW SCIROCCO MK1 '78 - ??? BHP - LHD
PORSCHE 924 '81 - 125 BHP - LHD
RIP VW SCIROCCO Scala '91 |
|
| Back to top |
|
|
|

